Welcome Spring

Welcome Spring

Sunday, November 28, 2010

Back Porch Decorating!


The way our house is situated, everyone comes to our back door instead of the front. So no one sees the front of my house, just the back because it sits sideways to the street and faces the river which is a wonderful view for us, but not good for decorating. So the back porch it is! I have a table that sits on the right side of the door that is always fun to put something on. The first picture you see is made with a simple grapevine wreath and deco mesh that I have absolutely fell in love with. I have used it on several of my wreaths for my booth and folks really seem to like them. Pine cones and a few ornaments are hot glued in and a lantern sits in the middle. Very simple to do. The wreath was very easy to. Again with the deco mesh and a few ornaments and berries was all that was needed. The urn was the most fun! I cut branches from our cedar tree and holly bush for the greenery, then more deco mesh (loving that stuff) and ornaments glued in so the wind won't blow them away. The little tree sits in two grapevine wreaths with a lantern behind and wa la, that is it. Very simple and it didn't take very long to do. I hope you enjoyed my very quick directions to. lol. Have a wonderful time decorating! Thank you for
visiting my blog. Please check out Metamorphosis Monday! You will be inspired!
http://betweennapsontheporch.blogspot.com/2010/11/hunt-themed-christmas-mantel-welcome-to.html

Saturday, November 20, 2010

Christmas Faux Fireplace Mantel!


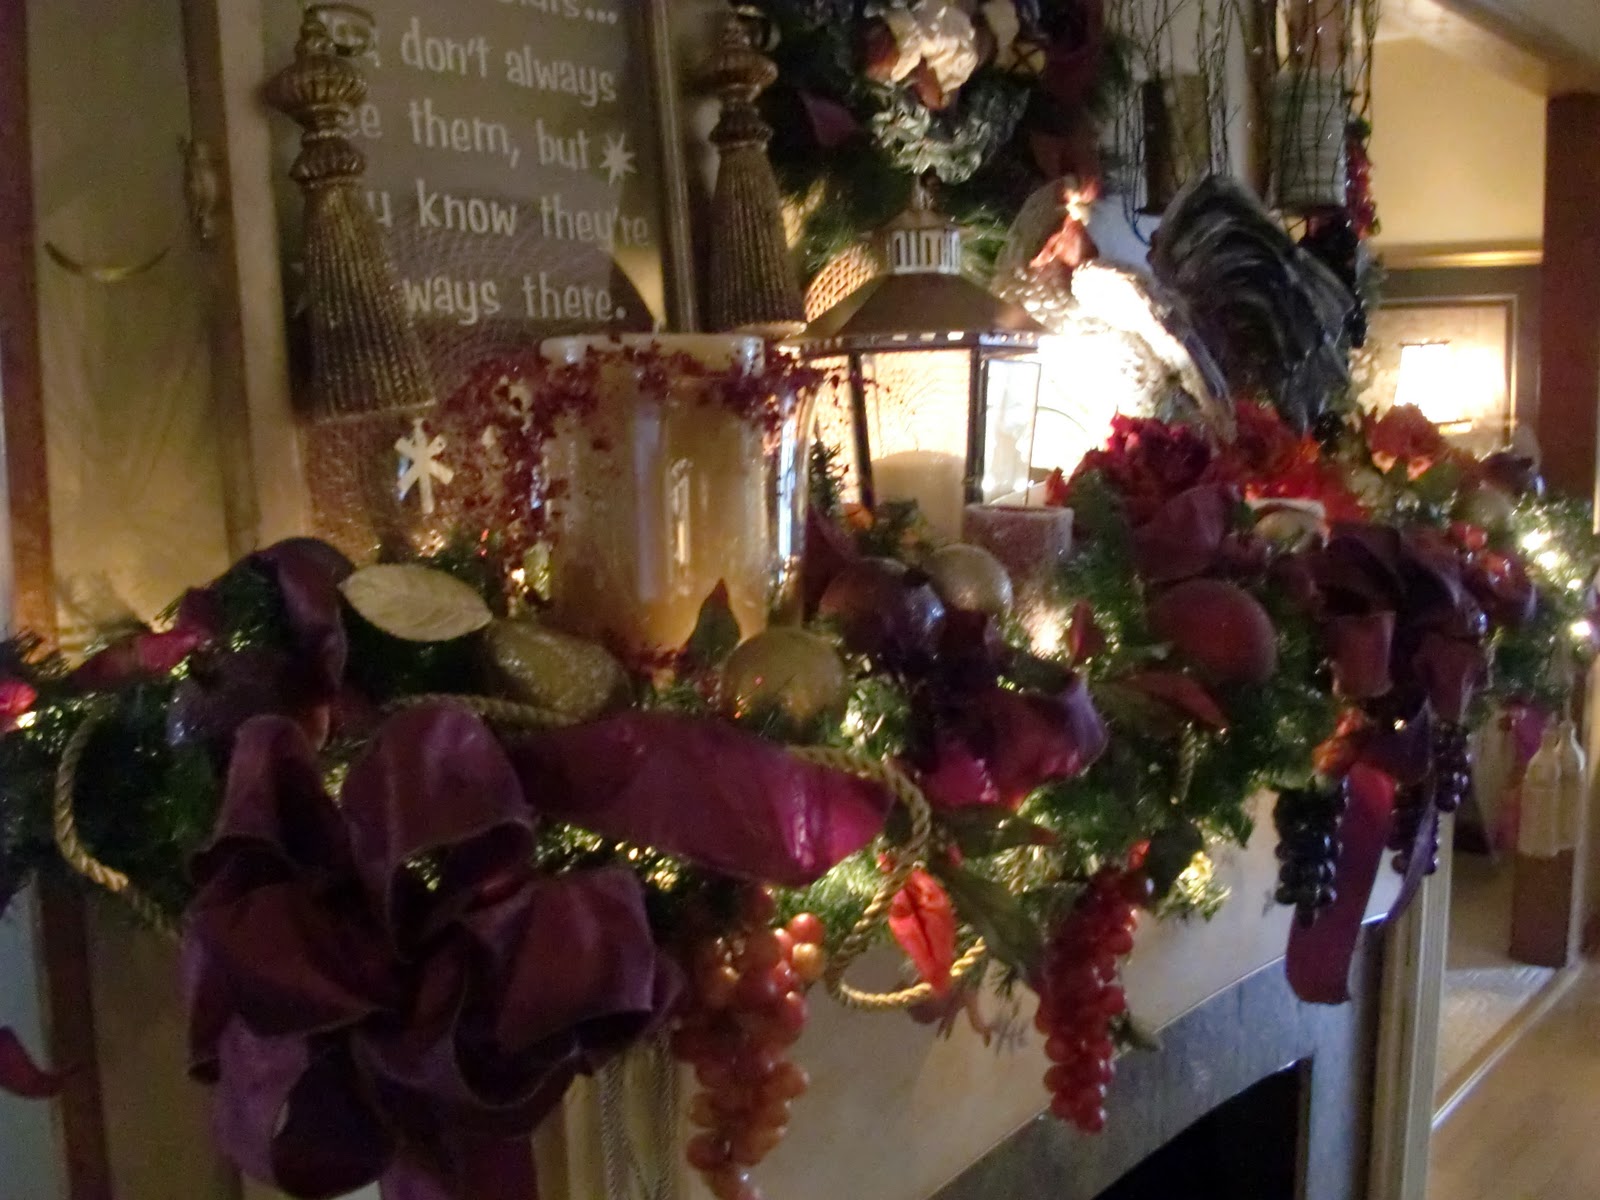
I have been having so much fun decorating this year for Christmas! But decorating a mantel is a challenge for me! So after the second time, I was satisfied. As you can see the old window on the left side probably took longer than anything. After a lot of cleaning I painted the wood a bright gold and the quote on the window was just the stick on kind. Love those things! I have them on other old windows in my house. The garland was way to long, so I just doubled it and then filled in with the ornaments and bows. I have a small uplight to shine on the wreath, there just wasn't enough light at night. The fireplace surround was in pieces when I bought it, hubby put it all back together and in order for it to look natural. I used thumb tacks to attach black fabric on the wall behind the electric logs, black fabric was also used on the floor. The logs sounds like fire popping and it so real, I have actually seen people back up to it to get warm. lol. I have tried to make it as realistic as possible. I hope you enjoy decorating and have as much fun as I do. Be sure and check out Metamorphosis Monday over at Between Naps on the Porch. You will be inspired. Thank you for stopping by! Blessings to you!


Sunday, November 14, 2010

Candles with a Little Bling!


I am having way to much fun! I still love candles! I know that Scentsy products are probably safer, having a little bulb melting the scents, but I can't do without my candles. I decorate with them, many of them have never been burned. I just love them in my arrangements. So all that to say, I found some unique ways to decorate them. Who would have ever thought that epson salt and mod podge combination could look so pretty. I also used glitter but mostly use them for the holidays. All I did was brush a moderate amount of Mod Podge on the candle, just making sure it is evenly coated especially at the bottom and the top. I had paper plates that I filled with the salt and just rolled the candle until it was covered. It was hard to make sure I didn't leave my finger prints on the candle moving it around but of course I did, so I just put more mod podge and more salt and it was fine. I also finished the top the same way and then let them dry. That didn't take very long, and then just shaking off the excess and walaaaaaa. You have your masterpiece of sorts!!! The little glass birds that are shown was done the same way except I used the glitter. The process is the same and they really turned out pretty to. The first two pictures shows them wet and the last ones are dry. I just love it, hope you enjoy it to. Maybe you will make some of your own! I am excited to use some of them in my decorating and the others will be taken to my booth at our local flea market. Be sure and check out Metamorphosis Monday over at Between Naps on the Porch  
http://betweennapsontheporch.blogspot.com/

Sunday, November 7, 2010

Already Decorating!


I know what you are thinking! It is way to early for this and I agree, but there is so much going on this month and next that I decided to just go ahead. We have a sunporch on the back of our house and a sunroom on the front, and when it is cold neither one is really used. So it is a perfect place to make my "Christmas Room". I have three trees up along with other decorations and it is still not finished. But the trees are decorated. I have no theme or a reason, I just use what I have. It is all from years of collecting. I keep thinking every year I will buy some new ones, maybe next year! My lights stay on the tree and on this first one, there is about 700. The smaller ones are 100. I have two large pictures that I will put wrapping paper on with a bow to make it look like a large package. I will post pictures of it later and try to go all around the room. I also have lights that go around the top of the room. Since this is the only room I will decorate except one of my mantles and because we can sit and look through the french doors, we will be able to enjoy it until after Christmas. I hope you enjoy it to!
Be sure and check out Metamorphosis Monday over at Between Naps on the Porch. Link is enclosed.


Saturday, October 30, 2010

Mantel Decorating!

CIMG1534

Mantels are a pain to me! I have never been able to be satisfied after I would fix my mantel. On this one in our family room, it is marble and narrow. Why would anyone fix it like that? That will be a project for hubby one of these days, but in the meantime, I have to deal with it. The window you see was given to me and not in very good shape. After much cleaning and a coat of paint, plus a glaze it began to look rather nice. I went ahead and hot glued a cord around the inside of the window just to be safe. The stick on letters made it easy to dress the window. The topiary, the wreath, and the candle holders along with the candles all came from a local goodwill store. None of it was very much, I think all together the total cost of the makeover was about 10.00. Maybe decorating a mantel will get easier for me! I do enjoy them and there is nothing like a warm fireplace to set the tone of rest and relaxation. Have a wonderful day!

Sunday, October 17, 2010

Shadow Box!


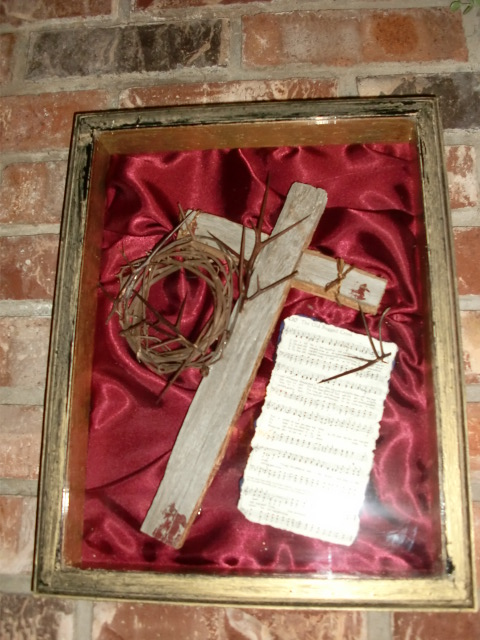
I love garage sales and junk stores! That is where the treasures are usually at! At this outing I found this shadow box that someone had attempted to do. I loved the theme and decided to take it and run with it. First thing I did was to crackle the frame to give it a more rustic look. I had a silk sheet set that I didn't care for (it was given to me) so I use it in different ways. The sheets are used as tree skirts, the pillow cases for mantle clothes or anywhere I need some color. So with a little misgiving, I did Cut the pillowcase into a slightly larger piece that would fit in the frame after bunching it up in the middle. The cross is just two pieces of wood and the thorns are real. Don't try this without gloves and at that it is still dangerous. The piece of paper that is not easily seen in the picture is from an old songbook entitled "Rock of Ages". Using hot glue everything is in place and has found a prominent place on my mantle. The theme is so meaningful because it reminds me of what Jesus Christ did for me and you. And when it really hit home was when I poked myself with that dreaded thorn. Maybe sometimes we just need a reminder, you think?
Thank you for stopping by, please go on over to Metamorphosis Monday You will be inspired by all these talented ladies!
Have a Wonderful Blessed Week!

http://betweennapsontheporch.blogspot.com/

Monday, October 11, 2010

Fall Wedding!


This one is the throwaway!


This last one is the Brides Bouquet!

I love Fall Weddings and it this was the first time I was able to do fall floral arrangements for a grandson (the other wedding was spring). Spring and summer weddings are beautiful, but the flowers for fall are spectacular. And, another blessing was the fact that hubby performed both ceremonies for the grandsons. (Grandson number 1 was in May of this year). As many of you have guessed I love floral design. I went to school many years ago in Memphis Tennessee and have been doing it ever since. Flowers (real or faux) just seem to make people smile! Now on to the particulars, there was 3 bridesmaids and of course the brides, and a throwaway bouquet. The flowers were purchased at Hobby Lobby, who can resist that store? The flowers were hand held and then just spaced properly then taped together with floral tape. I then tied ribbon around the stems and made a bow for the bottom of each. There was no one to take pictures when I was putting them together, sorry bout that. When I am finished with every design, I spray a sealer on it to protect the flowers. Then with most I use a (this one was mulberry) season appropriate scent to spray on them. I had so much fun with these, I hope you enjoy them also. Please go over to check out Metamorphosis Monday at Between Naps on the Porch (link follows). You will be amazed at the talent these ladies have.
Have a blessed and wonderful day!